Replacing the teak deck on my Offshore 40 was a memorable summer project that I am pleased I will not have to repeat. 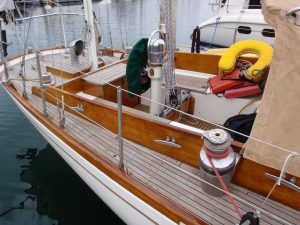 I found deciding when to replace an old teak deck to be a gut wrenching process. The teak decks of Moshulu had served as an ideal deck surface for 44 years and were so thin that most of the screws were so close to the surface that a bung could not be installed. Prior owners had managed to keep the teak in place with some new stainless screws and had covered many of the original bronze screws with epoxy to maintain a seal. The teak still looked good and provided excellent traction when wet. I could probably get a few more seasons out of the teak decks but with every wet Northern California winter I would have an increased risk that rain would find its way into the decks core as well as the bulkheads, making the project much bigger. I decided the piece of mind I would get from weather proof decks outweighed the lovely teak.
Working alone, it took all summer. Portions of the job were very messy. You will need a reasonable tolerant Harbor Master and friendly neighbors if you attempt to do the job in a marina. I greatly benefited from the experience of others, particularly Ben Stavis’ Handbook of Maintenance for Rhodes Reliant and Offshore 40as well as Sig Baardsen’s advice based on his recent undertaking of the same project on the Mary T following a circumnavigation.
Removing the Hardware
I was prepared to hire an assistant to help with hardware removal but found that job could be done single handed with the aid of an impact wrench. The Bosch IDH182 18 volt impact wrench (pictured) allowed me to remove almost all the stantions, cleets and other hardware without a man on the other side of 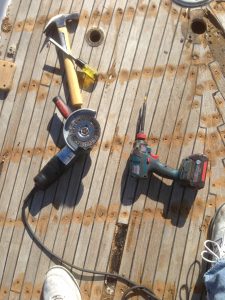 the deck to prevent a fastener from turning. I applied a lubricant, and paint remover where necessary, on nuts to allow the nut to be removed without causing the bolt to turn. On very few occasions I was required to use a visegrip to hold one part of a fastener while I worked on the other side of the deck. This particular wrench/driver accepts both a ½” socket driver and a ¼” hex bit driver. The ½” socket driver lacks the small protruding sphere that holds a socket in place but I found having both the socket driver and hex bit driver very useful and I would not have wanted to attempt this job without the tool. The other tool pictured is a variable speed grinder, also essential. It is worth mentioning that much of the boat’s hardware was custom made so it made sense to mark each item of hardware (including stanchion bases) as it is being removed so that it can be returned to the same location.
The teak decking runs under the mizzen mast step so I unbolted the mast step and lowered the mizzen using the main halyard. This was the one occasion I did need some help as the base of the mast slid sideways when it got close to horizontal. Fortunately a couple of pier mates were around to help me get the mizzen onto the cabin top.
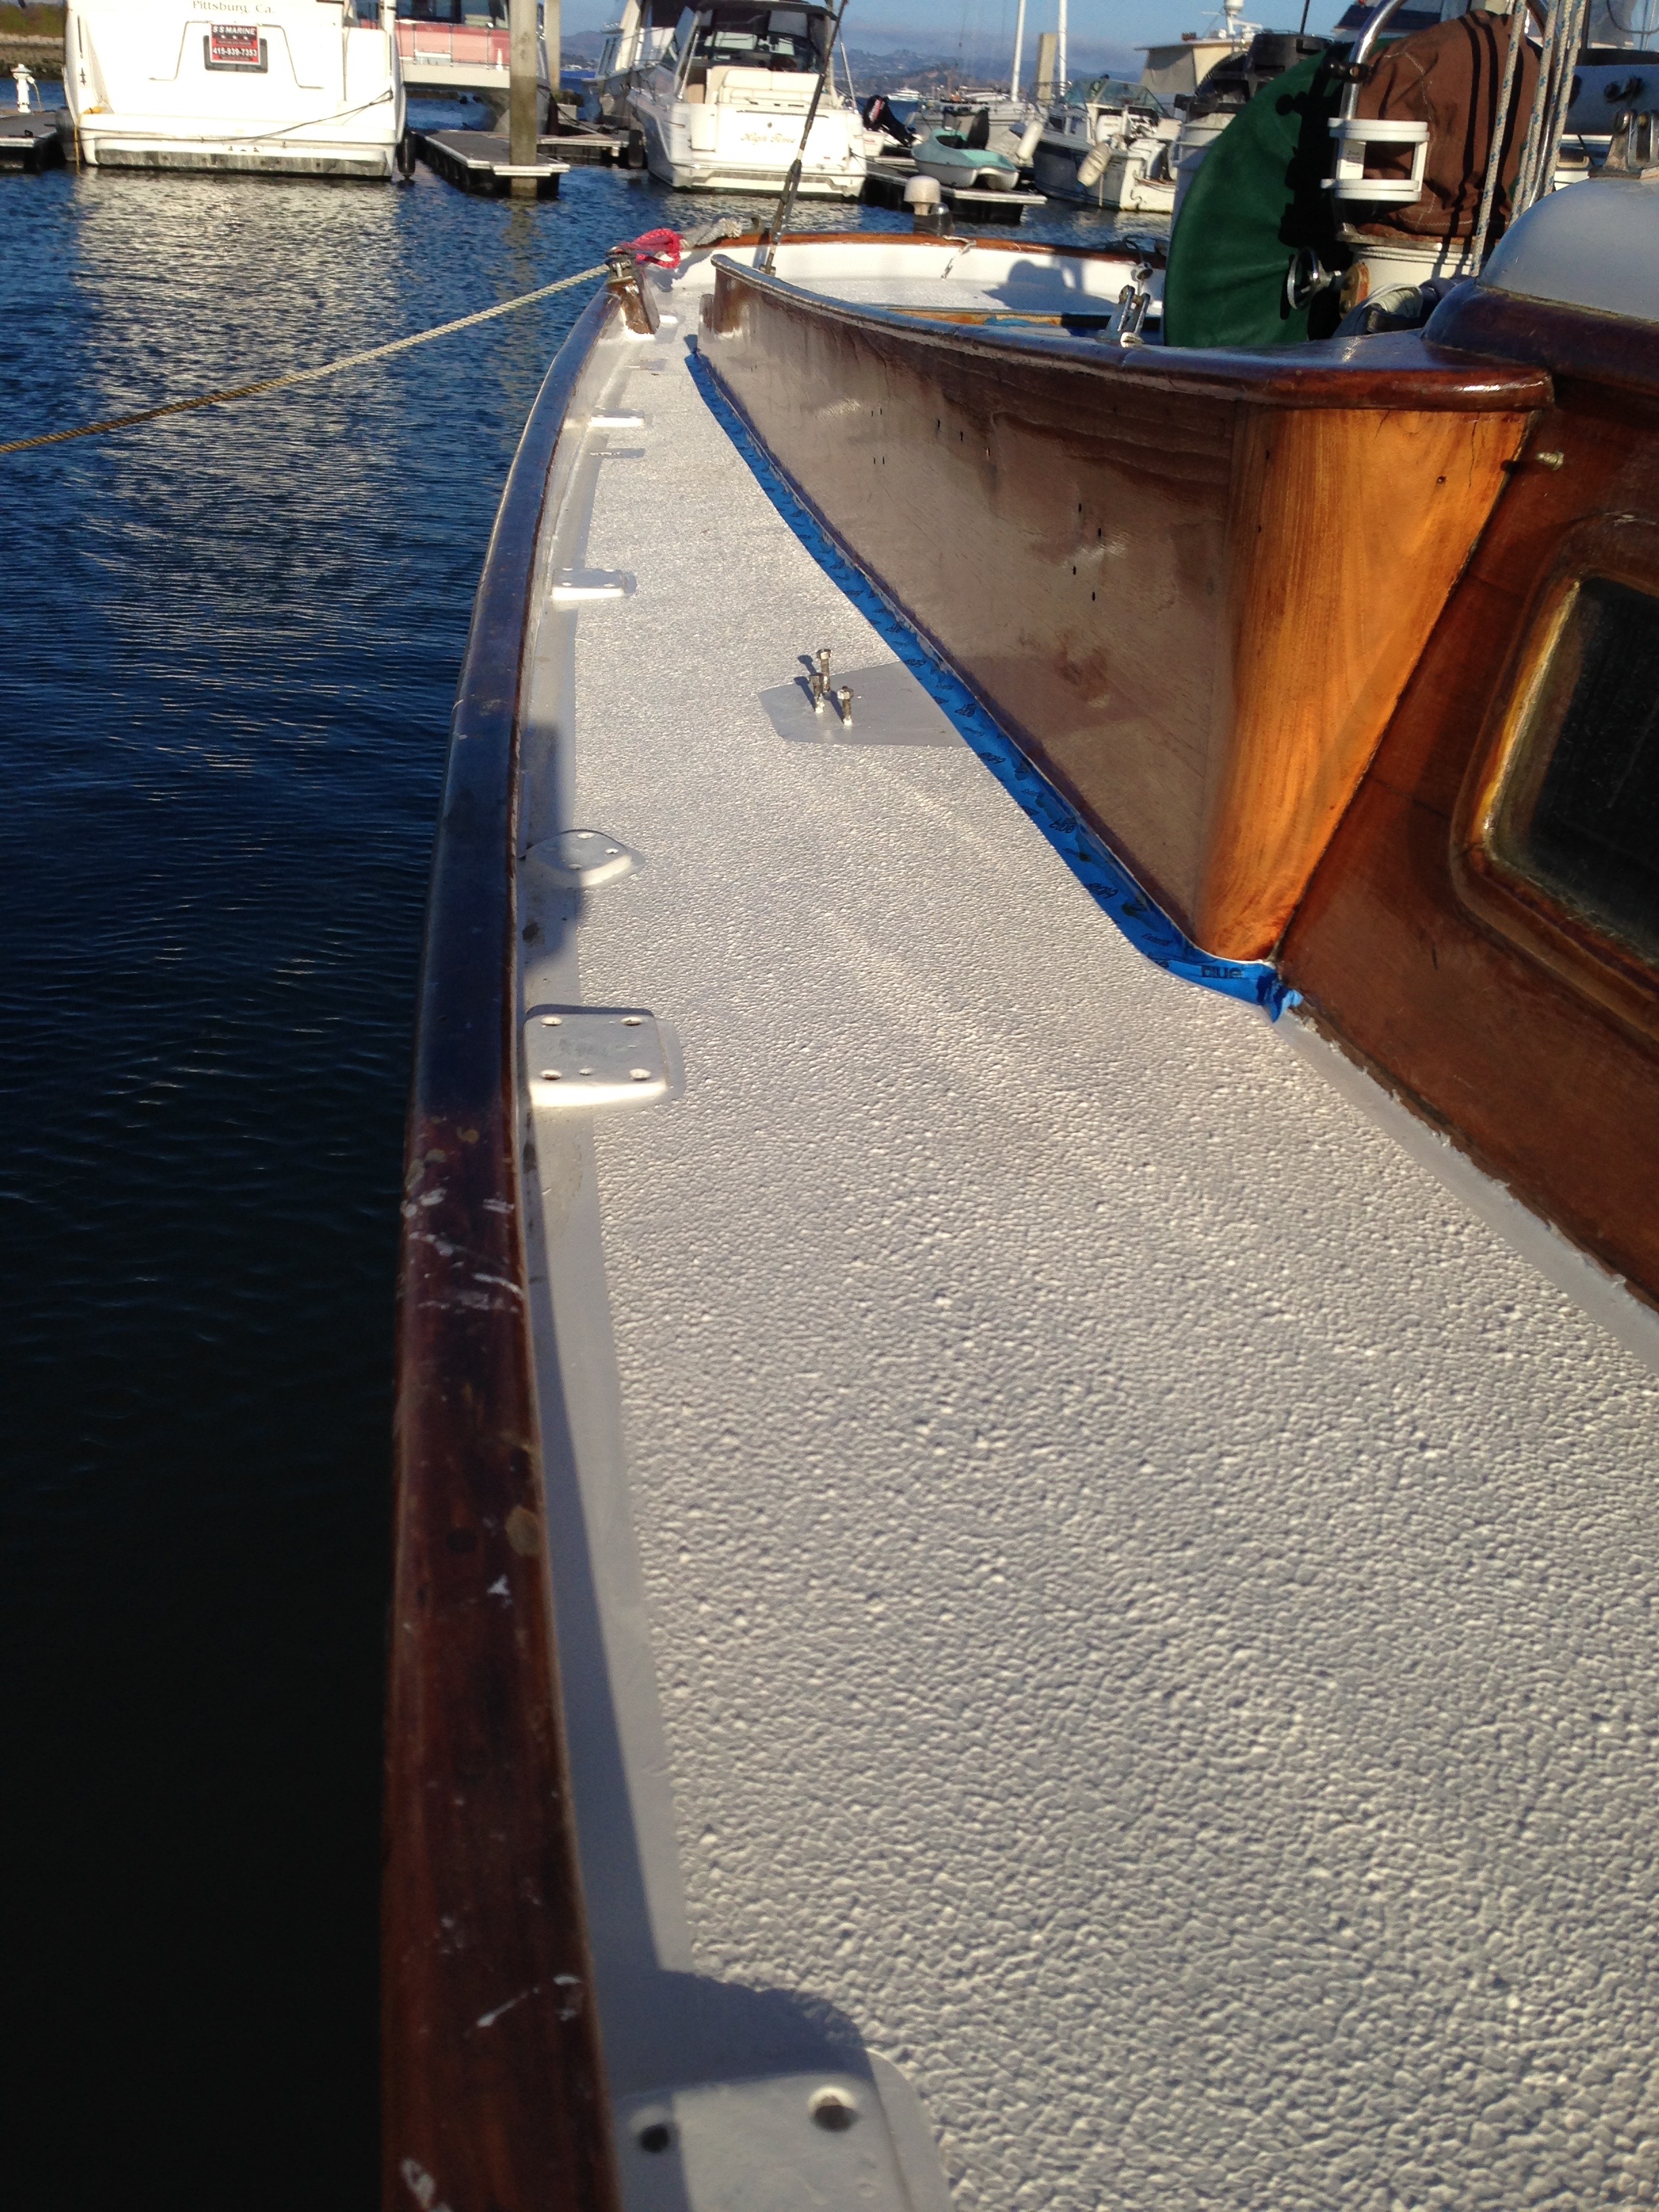
The teak decking also runs under the lazzaret hatch frame and the cockpit coaming. Removing the hatch frame was relatively straightforward but I was reluctant to remove the cockpit coaming as the deck job was already looking 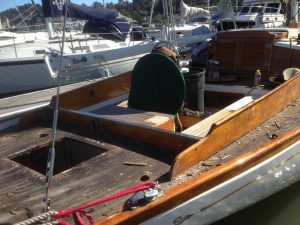 plenty big. I used a broad chisel to split or chop the teak where it went under the coaming and later sanded it flush with the coaming. I decided that if I removed the teak under the coaming I would have to replace it with something and that something would probably be teak anyway. After the deck was ready for painting I placed a thickened epoxy fillet along the base of the coaming to hold the teak in place under the coaming.
REMOVING THE TEAK AND BEDDING COMPOUND
Before removing the teak I attempted to preserve and remove the stanchion bases by sanding the top down to clean teak and applying a layer of cloth with epoxy. I found that in addition to the bedding compound the stanchion bases are held in place by two small screws. My hope was that the epoxy and cloth would hold the
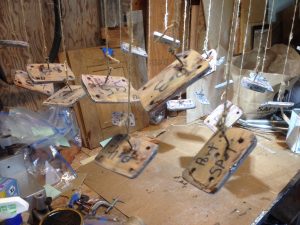
pieces together so that I could reuse the stanchion bases. I was ultimately able to do this but some of the bases came off in multiple pieces and required major repair. Each base needs to be labeled as they are all designed to compensate for the deck slope at their particular location.
I attempted to remove the deck screws after cleaning the bung or epoxy on the screw head with a wire brush on a grinder. After the screws, or their heads, were off the teak came up easily with a prybar and a hammer. I am not sure I can recommend this approach. Many of the screws twisted off so that they needed to be ground down anyway. Some have recommended prying up the teak first and then using a claw hammer to apply brute force to screw removal. That might have saved time.
Removing the bedding compound after the teak has been lifted may be the most challenging part of the project. I followed Sig Baardsen’s suggestion and used a cup brush on a variable speed grinder. One should set the grinder speed below the max speed for the brush to minimize the number of pieces of wire that get thrown off the grinder and become little metal arrows. Goggles, gloves, multiple shirts are a must for this part of the job. The grinder with wire brush does a good job of breaking up and removing most of the hardened compound. Unfortunately the grinder throws the compound onto other parts of the boat and deck, but at least it is then in a softened state. At that point I used lots of paper towels and De-Solv-It. to remove the softened compound from the deck and cabinsides.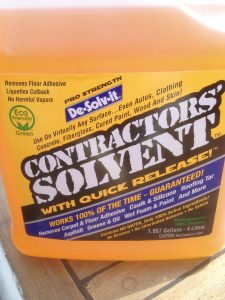
I found De-Solv-It described on an internet page where the author detailed removing the teak from a different class of Cheoy Lee. It was not available locally so I tried the the Home Depot version of citrus cleaner, ZEP Heavy-Duty Citrus Degreaser. I sprayed the Zep on the deck and it beaded up like water on a freshly waxed car. It had no effect on the bedding compound. I subsequentially obtained a gallon of De-Solv-It on the internet and found that it worked very well. Spray it on, wait a minute or two and the bedding compound can be wiped up with a paper towel. De-Solv-It did not smell toxic and could be rinsed off with soap and water.
REMOVING THE SCREWS AND FAIRING THE DECK
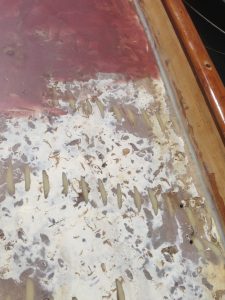
Because so many of the bronze screws had broken off I chose to use a grinder to take out what remained of the screws and open up all the screw holes down through most or all of the top layer of fiberglass. The elliptical grinding divits were made fore to aft so there is good spacing between each divit. Each divit was then wetted out with unthickened epoxy before epoxy thickened with West System 406 Colloidal Silica was troweled into the divit. I tried to slightly overfill the divits to accommodate a small amount of shrinkage while hardening. After sanding a small percentage of the divits required a second a application of the thickened epoxy. A final sanding removed any remaining bedding compound and made the epoxy fill flush on the deck.
Sanding is a big part of the job. I can highly recommend the Festool RO 125 FEQ Rotex sander as being very effective. The tool has an orbital mode but for this job I was mostly using the rotary mode with 40 grit Granat paper. A sanding pad on a variable speed grinder might be a cheaper way to go but I needed dust extraction so I wouldn’t create too much dust in the marina. I had tried attaching a vacume hose to the grinder when I was grinding out the screws but it was only marginally effective. Festool makes dust extractors that work well with the sander and don’t require constant filter cleaning.
I used epoxy thickened with West System 407 Low Density Filler for a final fairing of the deck. The dark red color helped in determining how thickly I was applying the material. Mixed to the right consistency the filler very nice self leveling characteristics.
I suspect the teak bedding compound acted as a sealant for the joint between the toe-rail and deck. Sig Baardsen reported that the
bolts used to attach the toe-rail are subject to erosion. I applied a thickened epoxy fillet along that joint to minimize the chance the water running down the deck will penetrate under the toe-rail.
I also put a fillet at the base of the cockpit coaming to hide and hold in place the teak deck that remained under the coaming. Sanding down the fillets by hand to give them a smooth look was slow and tedious. I found using the Festool sander in rotary mode with 60 grit paper on a soft pad and pushed next to the bottom of the coaming gave a smooth finish quickly and easily. To protect the teak coaming I applied Gorilla duct tape over standard masking tape. With extra slow hardner the epoxy continues to harden for a few days so the sooner it was sanded the easier the sanding went.
Fortunately, there were no areas of the deck that appeared to show any weakness or delamination from water intrusion. I did not add any layers of epoxy and cloth to the deck as I didn’t think the very thin layer of teak decking added anything to the structural integrity of the deck. Others have described how the foredeck just forward of the cabin shows some flexibility when pounded on. Moshulu is no different in this respect though I assume Rhodes knew what he was doing when he designed the foredeck. It is also possible the attempting to take the flex out of the foredeck with more layers of clothe and epoxy could transfer the force of impacts to other locations that would then be subject to failure.
INSTALLING THE STANCHION BASES
I wanted to eliminate the possibility that reinstalled fasteners would leak into the core so, before reinstalling any of the hardware I drilled out the fastener hole in the deck with an oversized bit, filled the enlarged hole with thickened epoxy, and then redrilled the hole for the fastener. This approach should provide an epoxy collar around
each fastener so that if the sealant fails, any water will leak into the cabin but not the deck core. The rail side two fasteners on each of the stanchions do not go through the core so I created epoxy collars for only two holes for each stanchion. While the stanchion bases were off the boat I refurbished them and encapsulated them in epoxy to minimize swelling and shrinking with moisture exposure.
I used the two bolts in the rail side holes to orient the stanchion bases in the correct location while they were being attached to the deck with epoxy. I found that it was important to remove the bolts as soon as the epoxy first hardened as the bolts became much more difficult to remove after the epoxy had more time to harden. I then drilled the holes for the cabin side holes through the newly installed epoxy cores, using the stanchion base as a guide.